Basic Usage of the Timeline App
The Timeline app is designed to provide a comprehensive view of events, tasks, emails and other related records for a specific record.
In essence, the timeline is a more flexible version of the default Salesforce activity timeline.
Using the Timeline
In order to use the timeline, the component must be setup and added to a lightning page layout. More information about the setup can be found in the configuration section.
Users of the timeline will need to be granted the Timeline User permission set.
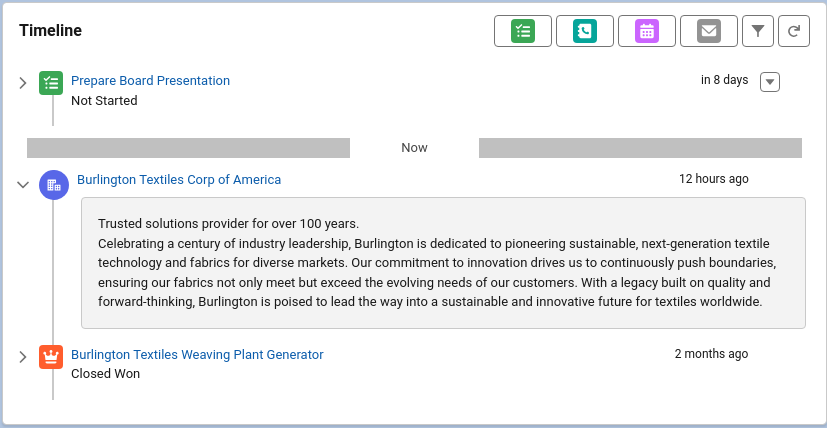
Once configured, the timeline will display items in chronological order. You can view past and future items by scrolling through the timeline.
User interaction wit the timeline mainly happens in four places.
-
The top bar of the timeline contains buttons for global quickactions and a refresh button. The buttons in order are:
- New Task
- Log A Call
- New Event
- Send Email
- Change timeline filters
- Refresh the timeline
The first four are quickactions, the admin can choose which of these buttons are visible. The filter and refresh buttons are always visible.
-
If the item has a description, the timeline item will display an arrow button to the left of the icon and title. Clicking it will open the description for the item.
-
PRO Item Actions, the last column in the timeline, can contain a dropdown menu if actions have been defined and are available for the item.
-
Item titles can be links. Usually to the displayed record. Clicking the link will open a new tab.