Configuration
Permissions
Before the app can be used, the required permissions have to be assigned. The app comes with two permission sets, 'Timeline User' and 'Timeline Admin'. To be able to use the apps Setup page, the user needs the 'Timeline Admin' permission set.
Users that only need to view the timeline, can be assigned the 'Timeline User' permission set.
Timeline Setup
Timelines can be configured through the Setup page. The tab is visible to users with the 'Timeline Admin' permission set.
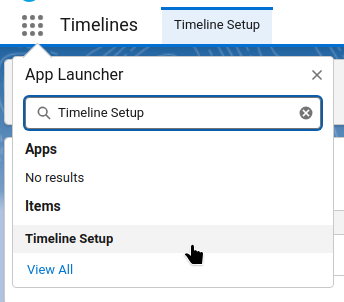
If the user has the right permissions the setup page can be found through the app launcher:
The configuration for timelines is stored in custom metadata. This means that the configuration can be developed and tested on sandbox orgs and deployed using change sets or the Salesforce Cli.
Having the configuration stored in custom metadata also means that the configuration will automatically be available in new sandboxes. However, there are some caveats:
When installing the app, a sample configuration for an account timeline included. This sample configuration can be viewed and used as basis for creating new timelines.
Since the sample configuration is created within the apps namespace it can safely be edited, when saving a new configuration outside the package namespace will be created.
Opening the Timeline Setup page shows a list of available timeline configurations. At the top left of the page are buttons to add a new configuration and to refresh the list.
Each configuration in the list has a menu with actions
- Edit
- Debug
- Refresh Cache
The debug action is described in the next chapter. The Refresh Cache action can be used to reset the org cache when the configuration has been modified through Salesforce's setup page. To improve performance of the timeline component the configuration is cached, in Salesforce's platform cache. This means that changes in the custom metadata may not be picked up by the component directly when modified through another way than the app's Setup page.
Items
A timeline setup is made up of setup items. Each setup item describes a way to place items on the timeline. There are two main types of setup items.
- Object items are records from a Salesforce object that are displayed on the timeline. The fields on the setup item describe how the record is retreived and displayed.
- PRO Apex items are provisioned through a custom apex class. This is described in the custom providers chapter.
When creating an object item most fields have a list of suggestions to choose from. Note that it is usually possible to configure values that are not in the list.
When a field name is entered that a user has no read permission on, the value of the field will be cleared before being displayed on the timeline.
The main fields used to determine which records will be shown on the timeline are parent lookup and where condition. At least one of those fields needs to be filled, when both are set the conditions are combined with the AND operator. The parent lookup field can be used if the timeline item has a lookup that references the parent object on which the timeline is shown. This can be an indirect lookup, like Opportunity.AccountId on the Order object. The where condition field can be used to add extra filters, like Stage = 'Closed Won' to only show won opportunities or to allow subqueries like RelatedToId IN (SELECT Id FROM Opportunity WHERE AccountId = :recordId) to retrieve emails related to opportunities on the account timeline. The :recordId parameter will be set to the Id of the record on which page the timeline is shown.
All fields have an info icon that will show more information about how the field is used.
Actions
PRO actions are a pro feature.
Actions have a label that will be shown in the dropdown menu. The order of the actions is determined by the Order field, lower values will be at the top.
The condition field can be used to determine when an action is shown or hidden. It should refer to a checkbox field, if the checkbox is on the action will be shown. If the fieldname is prefixed with an exclamation mark ! the action will be visible when the checkbox is off.
There are four ways in which actions can be executed, each action can use one or more ways.
- Screen flows: Will start a flow interview for the screen flow set in the action.
- Autolaunched flows: Will start a flow in the background. After the flow is finished the timeline component will refresh.
- Lightning event: Will publish an event with the given eventType on the TimelineAction lightning message channel. Lightning components on the page can listen to these events and execute actions based upon them.
- Apex Callable: Will execute an apex callable class in the background and refresh the timeline component afterwards.
Lightning Page Setup
On lightning record pages the timeline component can be found under 'Custom - Managed' components with label 'Record Timeline'.
When the component is placed on a record page it will have several settings available.
- The main one is the configuration record that should be used. The picklist is automatically filtered on object type, so a configuration has to exist before adding the component to a page.
- The second one is the order, the timeline can be shown in ascending or descending order. The default is descending.
- Debug mode can be turned on to show warning messages if a user has no permissions on fields that are set up to be used. These fields are filtered from the result set, and will show up as an empty value (
null). When this option is not off the user may not notice that some information is missing. - The next four options can be used to enable or disable the quick action buttons at the top of the component. In order they are 'New Task', 'Log a Call', 'New Event' and 'Send Email'.